Transition (stinger) set up guide
Transitions -
Adding a transition screen to a streaming channel is often avoided by many streamers as they are seen as a difficult, and complex addition.
In our experience we have seen streamers decide against buying them to make things simple and avoid all the hassle. This is a big mistake as a transition screen can really add to the professional feel of a stream and make your viewers experience much more enjoyable.
This small animation really makes a huge difference to a stream and is a huge standout item in your stream graphics arsenal!
We believe that everyone should have one and shouldn’t be worried with the hassle of setting one up. For that reason we have created a simple 4-minute video guide and step by step instructions below to help with the set up.
To Skip to the video - scroll to the bottom of this page. To see more of Mr Spacko on his fun filled stream - Click Here.
Step 1 -
Click on the small cog as pictured below ‘Edit Scene Transitions’

Step 2 -
Click to add your transition -

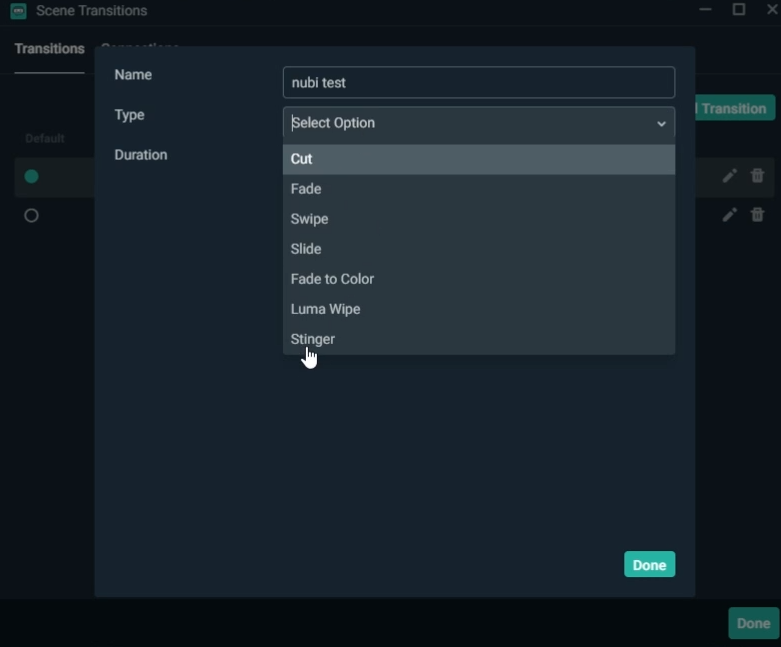
Step 3-
Set the transition type to ‘Stinger’ - This is very important!
Step 4 -
Click ‘Browse’ and find the File on your PC. Usually, if purchased from us, this file will be named by us - ‘Transition’ when you receive your finished files.

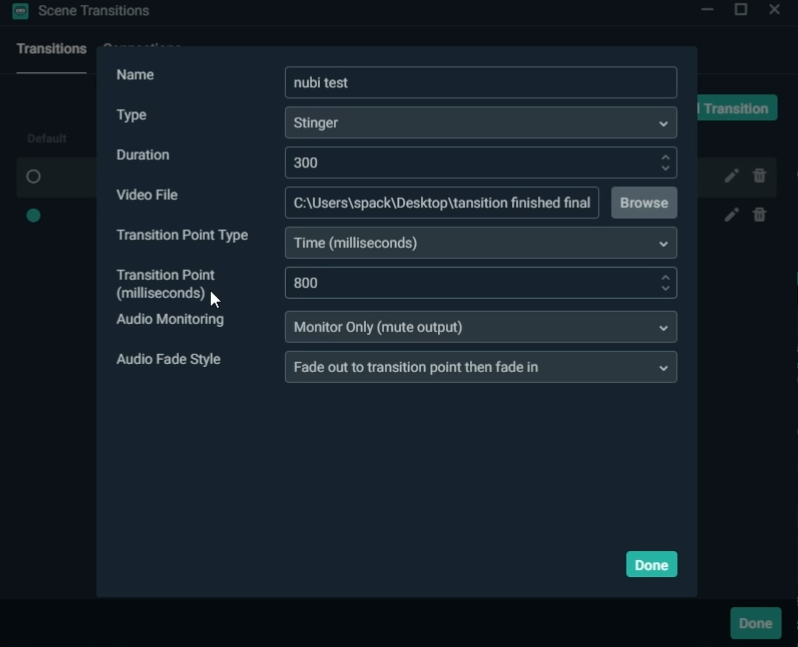
Step 5 -
Change the ‘Transition Point’ to suit your transition. For this there is no ‘one size fits all’ approach, it’s something that is unique to each transition.
In the example below, it is set for 800 milliseconds - This is a great starting point.
The best way to get this right is to set it for 800, test the transition by simply switching scenes. If the timing is out, adjust the time in milliseconds accordingly. Trial and error is key!